Showing posts with label photo manipulation. Show all posts
Showing posts with label photo manipulation. Show all posts
Saturday, 22 September 2012
Saturday, 4 August 2012
Saturday, 28 July 2012
Saturday, 21 July 2012
Thursday, 19 July 2012
Wednesday, 18 July 2012
Saturday, 30 June 2012
Before and after ( tebalik ahahah)
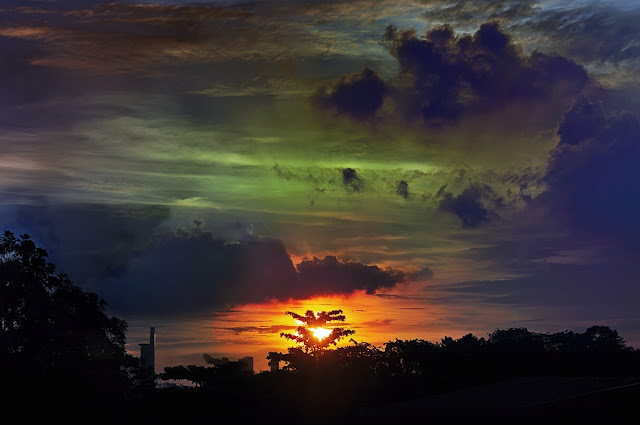
Taken with D5000 ( not mine ) - dia punya kawan yang punya ni picture...
saya cuma tambah garam/ gula (ops perlu ka), aji no moto, kari ayam, and perisa-perisa yang dibenarkan. hahaha..
jangan tanya saya siapa nama dia. ahhahaha
I just love the sunset..
REMEMBER !!!
nature prove that GOD is real.. He created everything.
GOD BLESS
Friday, 29 June 2012
Wednesday, 27 June 2012
Tuesday, 26 June 2012
Tuesday, 19 June 2012
Saturday, 16 June 2012
Manipulasi Gambar ( Abstrak )
YEAH YEAH YEAH !!! Selamat petang. Masih belajar memperbaiki teknik Memaipulasi gambar. Huu..sedih, belum dapat menguasai sepenuhnya. Teknik dalam penghasilan gambar manipulasi ialah,
bermain dengan layer, layer mask, brush tool, eraser tool, selection tool, colouring, panning... and lama-lama jadi pening kepala o. :)
Berikut merupakan salah satu daripada hasil kerja atau experimant saya pada kali ini.
P/s - kualiti gambar agak kurang memuaskan dan agak rendah. Hal ini membuatkan gambar pecah, and kelihatan seperti rosak. its ok... Camera hempon je.. camera 2 megapixel sja.. so.. ^^ ______ ^^
 |
| This is my brother and his Motorbike :) sory for the bad picture quality |
 |
| Owh yeah... this is my classmate. since i get bored everyday so, MY HAND gatal o.. :) adding effect and background texture and Heavy retouch.. hahahah HEAVY or what? i dont know. ahhaha |
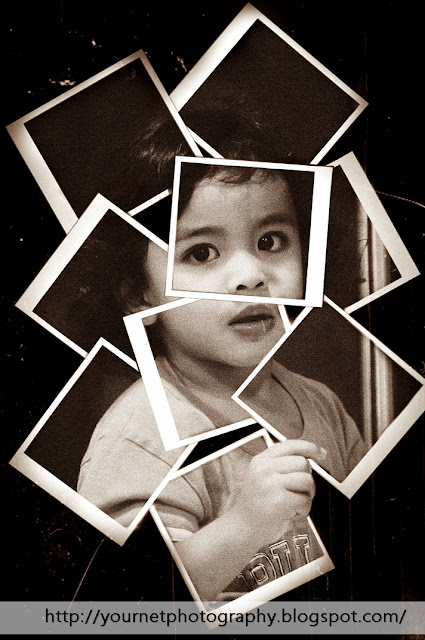
photo manipulation (Framing) tutorial
Actually this tutorial is my 1st tutorial about photo manipulation and i dint really know how to do it. But yes, i did it but i dont know if you guys will get it or understand my tutorial. I didn't really know the name of this type of photo manipulation. But here is the simple tutorial with screen shoot.


I am sory for my bad english and maybe its hard to understand this tutorial. Give me feed back so that i can improve it :) thanks..
stay tune for next tutorial. MAYBE in video (easy to understand).
 |
| The first thing we have to do is duplicate the original picture ( layer ). Because my principal is "Always working on COPY" because Photoshop is DESTRUCTIVE photo editor. And then the next step is making a new layer ( empty layer ) by pressing Ctrl + Alt + Shift + N. Refer here . And then after making a new layer, use the Rectangular Marquee Tool to make a rectangle shape then press ALT + backspace. But make sure you choose the correct colour ( up to you, i choose white coz it will be better in B&W latter on. |
 |
| ok.. lets make it simple, you should get this after pressing alt+backspace. Then make another rectangle using the same tool, right click and press layer via cut. ( making a frame ) |
 |
| After that, just delete the part that you already cut ( the middle part ) |
careful when placing the layer because it will affect your frame composition.
 |
| Here is the important part. If you making a photo manipulation like this, you should consider one thing as above. MAKE SURE you do it. hahha ops... terlebih sudah.. make it like 3D. |
 |
| Read the text on the screen shoot. |
 |
| Yeah... keep doing the same thing until you complete the frame you want. This is the final result for the random album frame. Bersepah dew. hahaha |

Making a selection. ( read the text in the screen shoot )

Adding a noise. Just follow the step until you found "add noise" tab.
 |
| Add noise Box should appear like this and tuuut... read the red text. |

Yea. Making a selection for outer or unwanted part. Go to select and choose colour range
 |
| ^^ make sure you click accurately |
 |
| Th ten after making the selection click select and inverse :) |
 |
| start painting outside the subject. Make sure you paint carefully. Don't paint inside the subject. |
 |
| yeah...actually we're done already. But we have to add some more effect. Go for black and white (optional). Adjust the amount of RGB colour. |
 |
| This is the final RESULT ( but you can make it better than mine and you can make it in color too) |
I am sory for my bad english and maybe its hard to understand this tutorial. Give me feed back so that i can improve it :) thanks..
stay tune for next tutorial. MAYBE in video (easy to understand).
BABAI....
Subscribe to:
Comments (Atom)

© 2012 Your Net Photography, AllRightsReserved Bendly Roy
( ^_^)y
About Me
I am not a Photographer. I just Love to express my personality trough some kind of beautiful and meaningful picture ( Dimension ). - Bendly Roy -
Its depend on what people thought about me. But still, I am capable to do what other's (photographer) did too. So, don't hesitate to ask me favour (anything).
It might be free of charge and depends (mau belanja or tidak). hahaaha.
Popular Posts
-
LAHAD DATU -- Kes pencerobohan di Kampung Tanduo, Lahad Datu yang berlanjutan hingga 17 hari berakhir semalam dengan insiden tembak...
-
confusing now huh!! saangat-sangat susah untuk memilih mana camera yang terbaik. DULU-dulu sy buat comparison D7000 vs 60D, 600D, 7D. tapi...
-
The greatest Mathematician (Ahli Matematik Yang Terkenal Di Dunia) Matematik merupakan sesuatu yang amat penting dalam kehidupa...
-
Gambar ini ditemui di dalam laman sosial (facebook) dan sumber gambar ini tidak dapat dikenal pasti so sy tidak mampu memberikan sources l...


.JPG)


