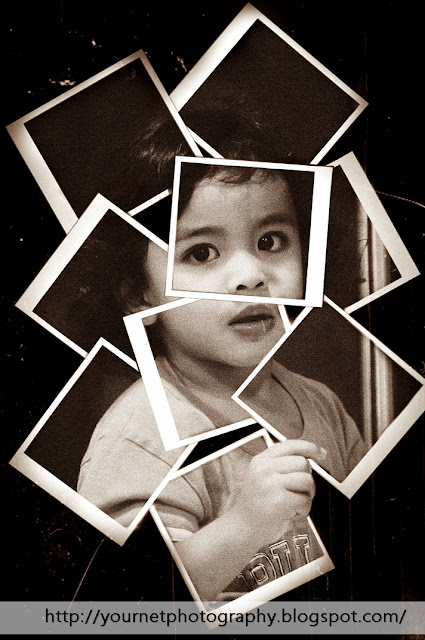
Actually this tutorial is my 1st tutorial about photo manipulation and i dint really know how to do it. But yes, i did it but i dont know if you guys will get it or understand my tutorial. I didn't really know the name of this type of photo manipulation. But here is the simple tutorial with screen shoot.
 |
| The first thing we have to do is duplicate the original picture ( layer ). Because my principal is "Always working on COPY" because Photoshop is DESTRUCTIVE photo editor. And then the next step is making a new layer ( empty layer ) by pressing Ctrl + Alt + Shift + N. Refer here . And then after making a new layer, use the Rectangular Marquee Tool to make a rectangle shape then press ALT + backspace. But make sure you choose the correct colour ( up to you, i choose white coz it will be better in B&W latter on. |
 |
| ok.. lets make it simple, you should get this after pressing alt+backspace. Then make another rectangle using the same tool, right click and press layer via cut. ( making a frame ) |
 |
| After that, just delete the part that you already cut ( the middle part ) |
 |
| Here is the new frame, but you have to make it like real frame by clicking the blending option. All you have to do is make sure that you know how to make it like realistic. Look at the picture, you have to adjust a few part like inner shadow, outer shadow and up to you as long as you satisfy with it. |
 |
| after making a frame, you should make a copy first as i said ( always working on C__ y) Alright, make sure that you keep one layer (frame ) and hide it by pressing the eye ( i think so, hahah), because you have to make a few more copies for this layer (frame). As you can see on the picture, you can rotate the frame by pressing CTRL + T but careful, dont resize or change the shape, just rotate it. Got it? |
 |
| Here we go..... Using the eraser tool and Brush tool as eraser. But i prefer using brush tool with layer mask ( read and understand the screen shoot above. OPS, please convert the frame layer into smart object 1st :) hihihi... |
careful when placing the layer because it will affect your frame composition.
 |
| Here is the important part. If you making a photo manipulation like this, you should consider one thing as above. MAKE SURE you do it. hahha ops... terlebih sudah.. make it like 3D. |
 |
| Read the text on the screen shoot. |
 |
| Yeah... keep doing the same thing until you complete the frame you want. This is the final result for the random album frame. Bersepah dew. hahaha |

Making a selection. ( read the text in the screen shoot )

Adding a noise. Just follow the step until you found "add noise" tab.
 |
| Add noise Box should appear like this and tuuut... read the red text. |

Yea. Making a selection for outer or unwanted part. Go to select and choose colour range
 |
| ^^ make sure you click accurately |
 |
| Th ten after making the selection click select and inverse :) |
 |
| start painting outside the subject. Make sure you paint carefully. Don't paint inside the subject. |
 |
| yeah...actually we're done already. But we have to add some more effect. Go for black and white (optional). Adjust the amount of RGB colour. |
 |
| We're done in photoshop.. anyway you still can use photoshop to add some effect but i prefer use photoscape (cool software ).. Simple photo editor. But i didn't include the SS (screen shoot )..You can make it your own.. very simple..just adding filter (antique filter).. ^^ |
 |
| This is the final RESULT ( but you can make it better than mine and you can make it in color too) |
I am sory for my bad english and maybe its hard to understand this tutorial. Give me feed back so that i can improve it :) thanks..
stay tune for next tutorial. MAYBE in video (easy to understand).


2 comments:
I like this tutorial.. I will try this to my picture too..Thanks so much for sharing this knowledge... Good Day
thanks buddy :) ^_^ i just did this tutorial for fun :) he he he.. and thanks once again for giving me feed back about my work.. more tutorial soon.. stay tune..
Post a Comment